by ffadmin | Jan 9, 2013 | Tips & Tricks
Part of the Fat Flush lifestyle is learning how to cut out the bad, and add in more of the good. You don’t have to sacrifice flavor for health and these are some of our favorite substitutions that prove it:
1. 3 tablespoons of ground flax seeds can be used instead of 1 tablespoon of margarine, cooking oil, or butter. (Your baked goods will brown more quickly so either shorten the baking time or lower the oven temperature by 25°F)
2. Substitute 1 tablespoon of cocoa by using 1 tablespoon of carob powder.
3. When baking, use unsweetened applesauce instead of sugar.
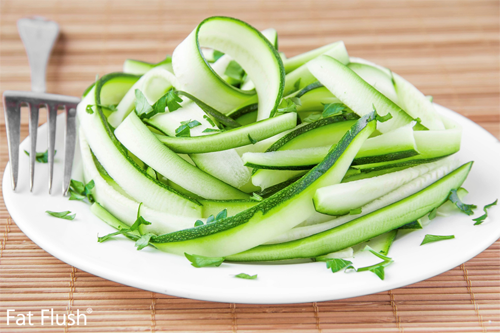
4. Use Zucchini Ribbons instead of pasta.
5. Mashed Cauliflower work nicely for mashed potatoes.
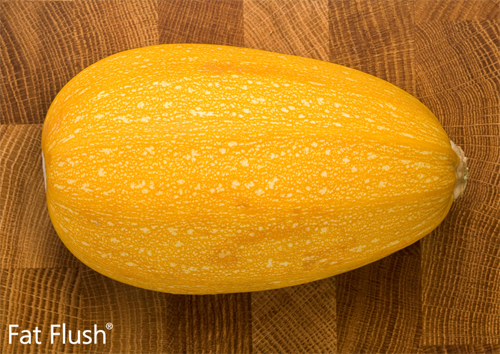
6. Use spaghetti squash “noodles” for pasta.
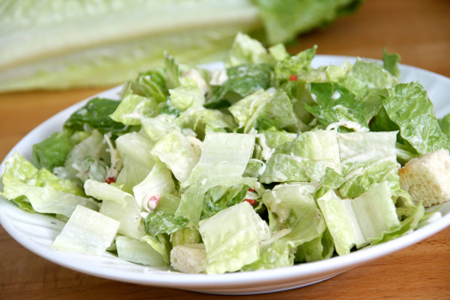
7. Lettuce leaves make delicious wraps (instead of tortillas).
8. Have Kale Chips instead of potato chips.
by ffadmin | Dec 10, 2012 | Tips & Tricks
One of the easiest ways to get a wide variety of vitamins is by tossing up a salad. But be careful with your toppings! It’s easy to pile on the sugar or sodium with a few of the wrong sprinkled ingredients.
What you put on your salad is only limited to your imagination, but here are a few classic salad toppers to get you on the right track.
Protein
- Meats (chicken, beef, salmon, tuna, shrimp)
- Beans (pinto, black, garbanzo)
- Hard boiled egg
Veggies
- Peppers (red, orange, yellow, green)
- Olives
- Green beans
- Tomatoes (cherry, grape, globe, heirloom, roma)
- Asparagus (steamed or grilled)
- Zucchini (raw, steamed, or sauteed)
- Cucumbers
- Onions (green, purple, yellow)
- Mushrooms
- Carrots
- Broccoli or cauliflower (raw or steamed)
- Avocado
- Jicama
Other Toppings
- Fruit (apples, pears, cranberries, strawberries, blueberries, plum)
- Nuts (pecans, walnuts)
- Seeds (toasted or raw: pumpkin seeds, sunflower seeds)
- Herbs (basil, parsley, rosemary, cilantro, mint)
**Note: Allowances vary by Phase. Use your Fat Flush Plan book to determine what toppings are ‘legal’ with your current phase.
What are your favorite salad sprinkles? Let’s add them to the list!
by ffadmin | Nov 5, 2012 | Tips & Tricks
This oh-so-yummy squash is more than your just average side dish veggie! The cooked squash flesh shreds into threads like spaghetti— hence the name. The strands make the perfect alternative to pasta, potatoes, or rice and can be served with any sauce.
Spaghetti squash is available year-round, but the peak season is in the fall. Like any winter squash, it can be hard and cutting it raw can take some muscle and a sharp knife.
Prepare in the Oven:
Cut the squash in half lengthwise and place, cut side down, in a baking dish. Add enough water to com about 1/2-inch up the sides of the dish and cover with aluminum foil. Bake at 375°F for 45 minutes, until the squash is easily pierced with a knife. Turn the squash over and cover with foil again and cook for another 15 minutes, until it is very tender. Remove from the over, uncover and let it cool slightly. Using a spoon, remove the seeds and discard. Using a fork, gently pull the strands of squash away from the peel.
Prepare in the Slow Cooker:
Pierce the spaghetti squash all over with a fork. Place the whole squash into a slow cooker with 2 cups of water. Secure the lid and cook on low for 8-9 hours. Once done, remove the squash from the slow cooker and let cool. When it is cool, cut the squash in half and scoop out the seeds. Using a fork, pull the strands away from the shell. (It should come out easily.)
Besides it’s delicious versatility, spaghetti squash is packed with beta-carotene, a powerful antioxidant. It can prevent the oxidation of cholesterol in the body and help regulate blood-sugar levels. The potassium in the squash helps lower blood pressure and it has tons of fiber! They come in different shapes, so look for a squash that is firm and heavy for its size. Soft spots and green color are signs that the squash isn’t ripe.
by ffadmin | Jun 26, 2012 | Tips & Tricks
Everyone hits a weight-loss plateau at some point and needs a slump-busting plan to get those pounds moving again. This 5-Day plan will help you do just that!
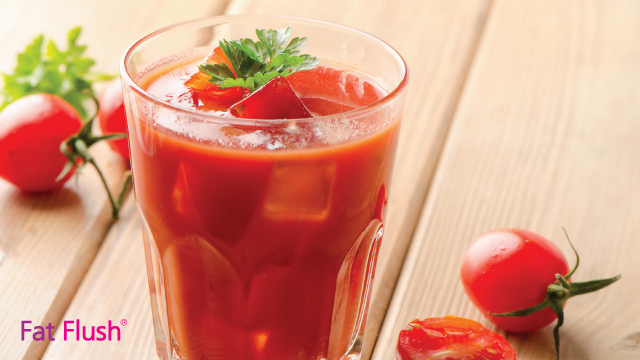
The centerpiece of the plan is the Hot Metabolism Booster Cocktail (recipe below) that you will be drinking as a “snack”, three times a day: morning, mid-day, and evening. The cocktail, due to its high water content, helps you to get filled up and stay fuller longer while keeping calories down.
Protocol
Enjoy the cocktail three times a day, and stick to these healthy foods for the rest of your daily menu:
Beverages: Drinking plenty of water between meals is a fundamental principle of Fat Flushing, in general.
Protein: By filling up on lean protein (eggs, fish, seafood, poultry, and whey) you can raise your metabolism by roughly 25 percent.
Veggies: Green and low-starch vegetables help to further detox your system while you increase fat burning.
Fats: Including another tablespoon of olive oil, in addition to what is in the cocktail will keep you satisfied so you can better stave off hunger pains. (Good fats are the most potent blood-sugar stabilizers)
Fruits: Berries, rich in fiber and flavonoids, combine with whey protein to provide a high-volume breakfast or snack.
Cocktail Recipe
Serves 1
Ingredients
1 large tomato, or 8 ounces V8 or Knudsen’s Very Veggie Juice
1/3 cup freshly squeezed lime or lemon juice
1/2 cup filtered water (unless using juice)
Handful of fresh parsley
Handful of fresh cilantro
1 green onion, chopped
1 clove garlic, crushed
1/8 teaspoon cayenne (or as desired)
2 teaspoons olive oil
1/2 teaspoon Seaweed Gomasio
1/2 teaspoon turmeric
1 teaspoon Flora-Key
1 tablespoon chia seeds
6 ice cubes
Directions
Combine all ingredients in a blender until the desired consistency is reached.
Adapted from ‘Fat Flush for Life’
by ffadmin | May 23, 2012 | Tips & Tricks
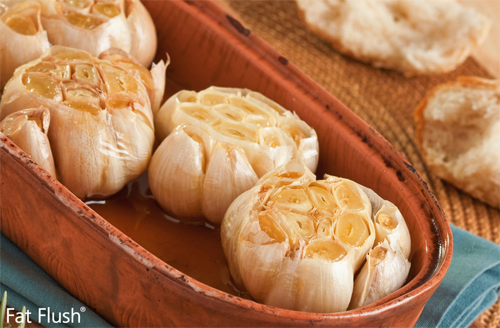
Add a unique depth to any side dish, soup, salad, or meat and poultry! Give your home-cooked meal the flavor and flair of a fancy restaurant with roasted garlic.
Here’s how:
- Start with as many garlic heads as you want.
- Cut off the heads, but leave the cloves in their skins.
- Wrap them in foil and place in the oven (preheated to 350°F) for about 45 minutes.
- You’ll know they’re ready to come out when they’re slightly brown and soft all the way through (poke them with a fork to find out).
